Node Cutter
User Guide (V1.0)
Node Cutter is a Unreal Editor tool that automates the process of gathering and capturing screenshots of all generated function nodes for both C++ classes and Blueprints.
Links and Support
- Download on FAB: Fab Listing
- Official Website: www.samcarey.dev
- Join the Community on Discord: discord.gg/BzmVednF2n
- Report Issues: Bug Report Form
Key Features
- Automatically capture all nodes for a C++ or Blueprint class.
- Auto background removal and edge masking for clean, ready-to-use images.
- Customizable render scale for high-resolution screenshots.

Why do you need this?
Creating documentation for Unreal Engine projects often requires images of Blueprint or C++ function nodes. Manually capturing and editing these screenshots is tedious and time-consuming.
Node Cutter eliminates the tedious, repetitive work of manually capturing and editing node screenshots. It’s ideal for anyone who needs to document Unreal Engine APIs.
Using the tool
After installation, open your Unreal project. In the main toolbar, look for the “Capture Nodes” button (with the Node Cutter icon).
- Click the “Capture Nodes” button in the toolbar.
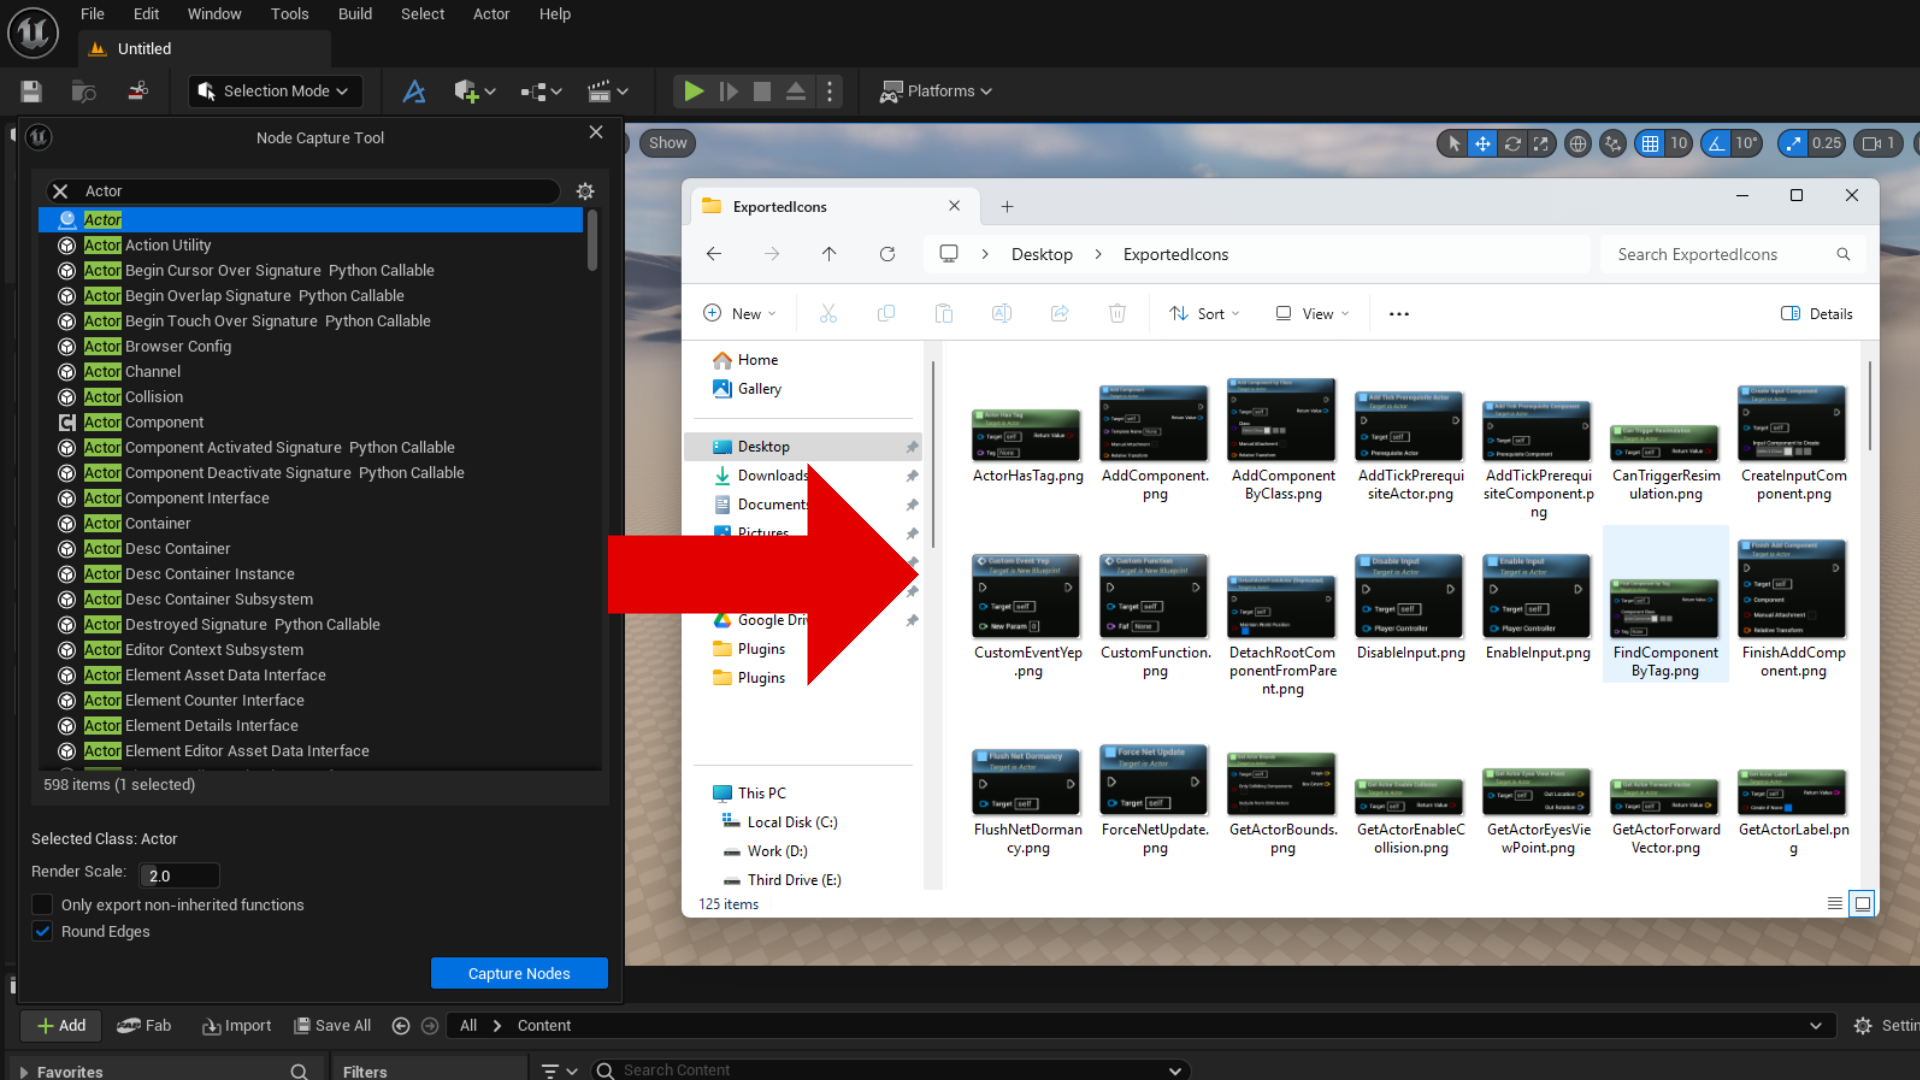
- The Node Cutter dialog will appear:
- Class Picker: Browse and select the C++ or Blueprint class you want to capture nodes from.
- Render Scale: Adjust the scale for higher or lower resolution screenshots (default is 2.0; higher values produce larger images).
- Only Export Non-Inherited Functions: Enable this option to export screenshots only for functions defined in the selected class, excluding inherited ones.
- Round Edges Toggle this to apply rounded corners to the exported images.
- Click “Capture Nodes” to proceed.
- You’ll be prompted to select an output directory for the screenshots.
- Node Cutter will process all Blueprint-callable functions in the selected class, generating a PNG image for each node in the chosen folder.
Changelog
1.0
- Initial Release.
